


How to promote 360 video on Instagram
360 video is an engaging way for users to consume media, so many platforms such as YouTube and Facebook have natively integrated 360 video support – including tools such as ‘spotlight’.
Other platforms, like Twitter and Instagram, have not yet adopted native 360 video functionality, so we’ve found a workaround with allows you to still tell your story, taking traits from Facebook’s spotlight tool, and using some basic video editing skills.
Import your 360 video
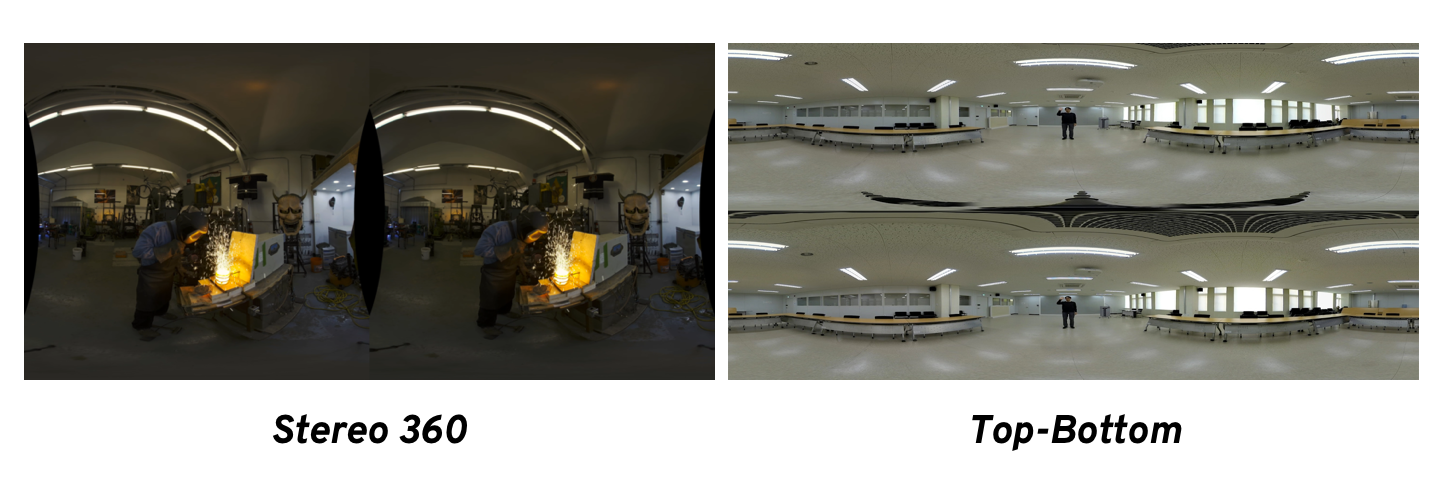
First, you need to import your video into editing software, for this, I’m using Adobe Premiere Pro. The video you import can be either in top-bottom format or stereo 360. Here’s what we mean by that:
Tip: make sure that the video is in an MP4 for best results.
Create a sequence
You now need to create a video sequence, in basic terms, this is a timeline in which you can insert video and audio files. We’re going to be creating a sequence which is square (perfect for Instagram).
I’ll be using Adobe Premiere Pro for this so click: File > New > Sequence.
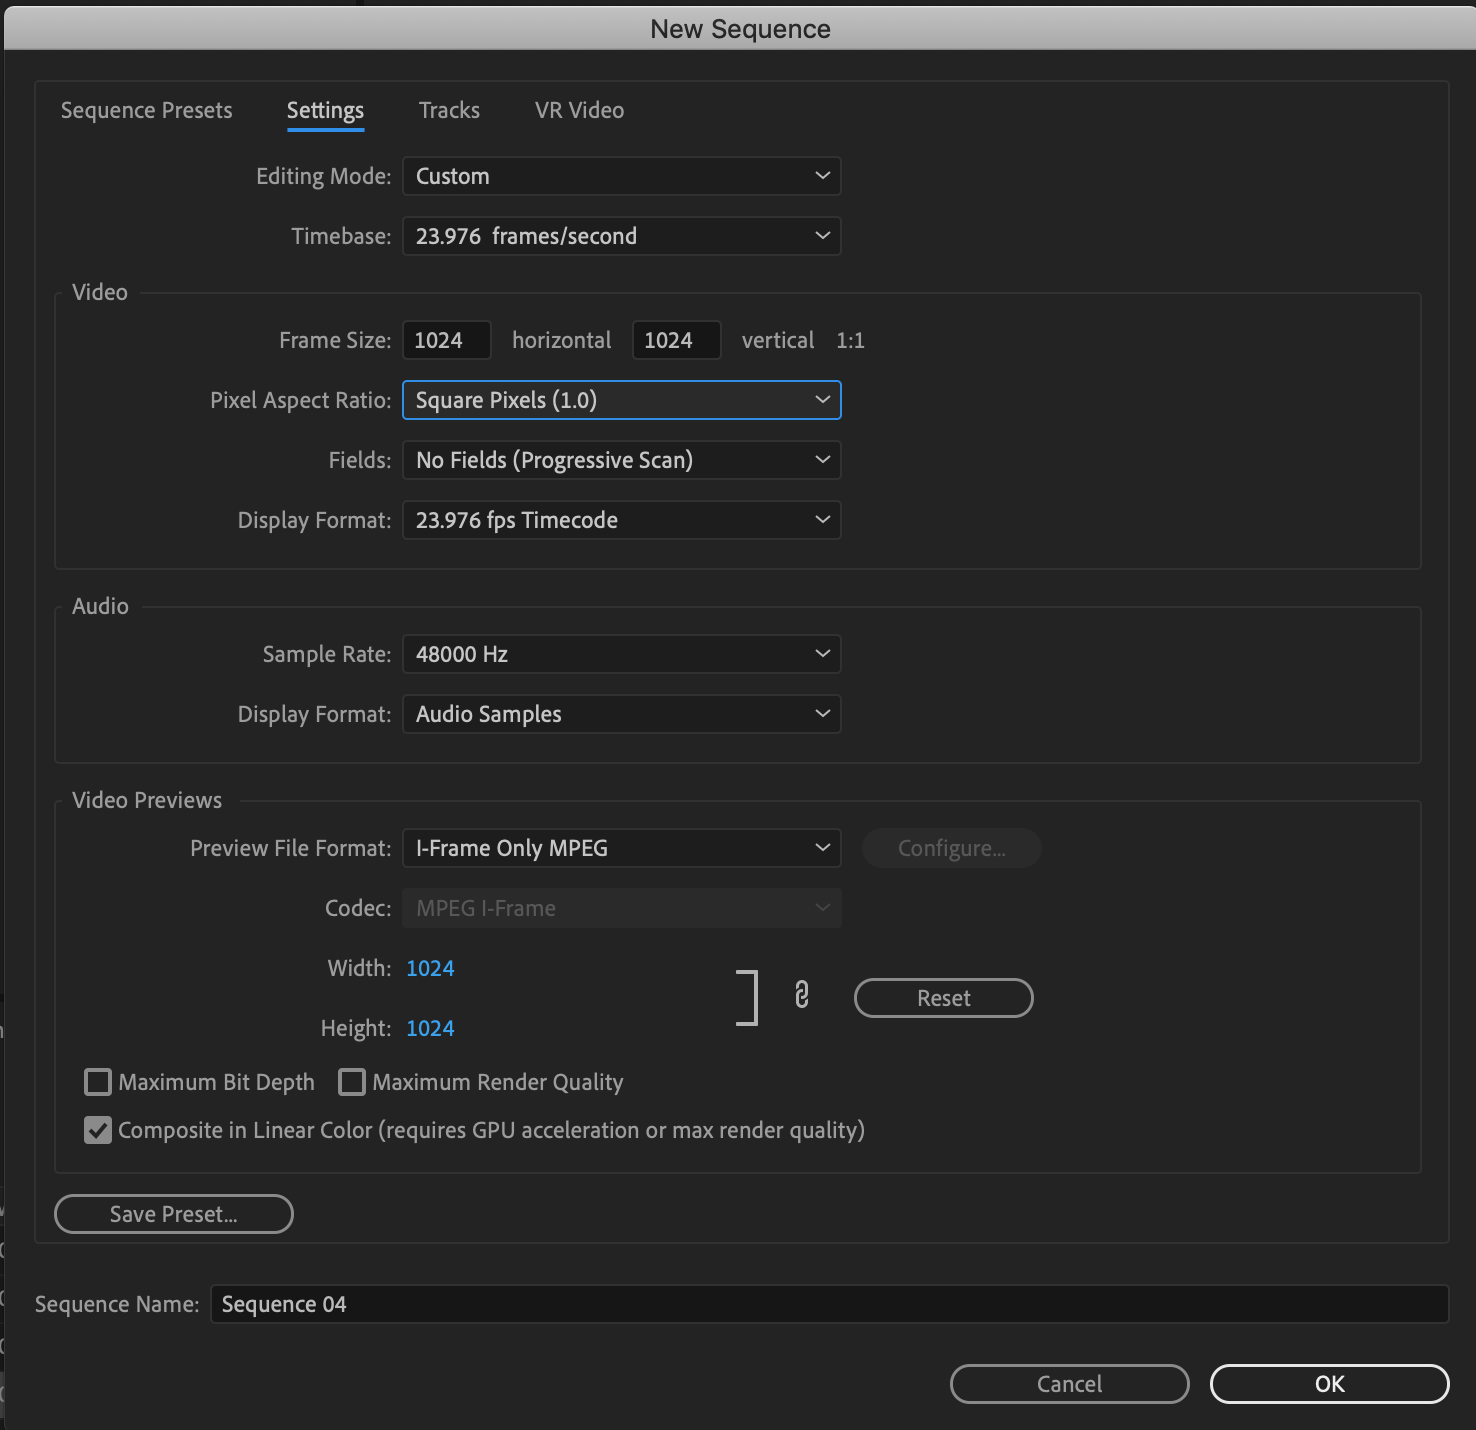
Then in the sequence settings, set the editing mode to “Custom”, this will allow you to change the sizing of the frame.
Next, change the pixel aspect ratio to “Square Pixels 1:0” and the sequence frame size to 1024 x 1024 – this is the maximum frame size that Instagram accepts and means your video will look sharp when posting.
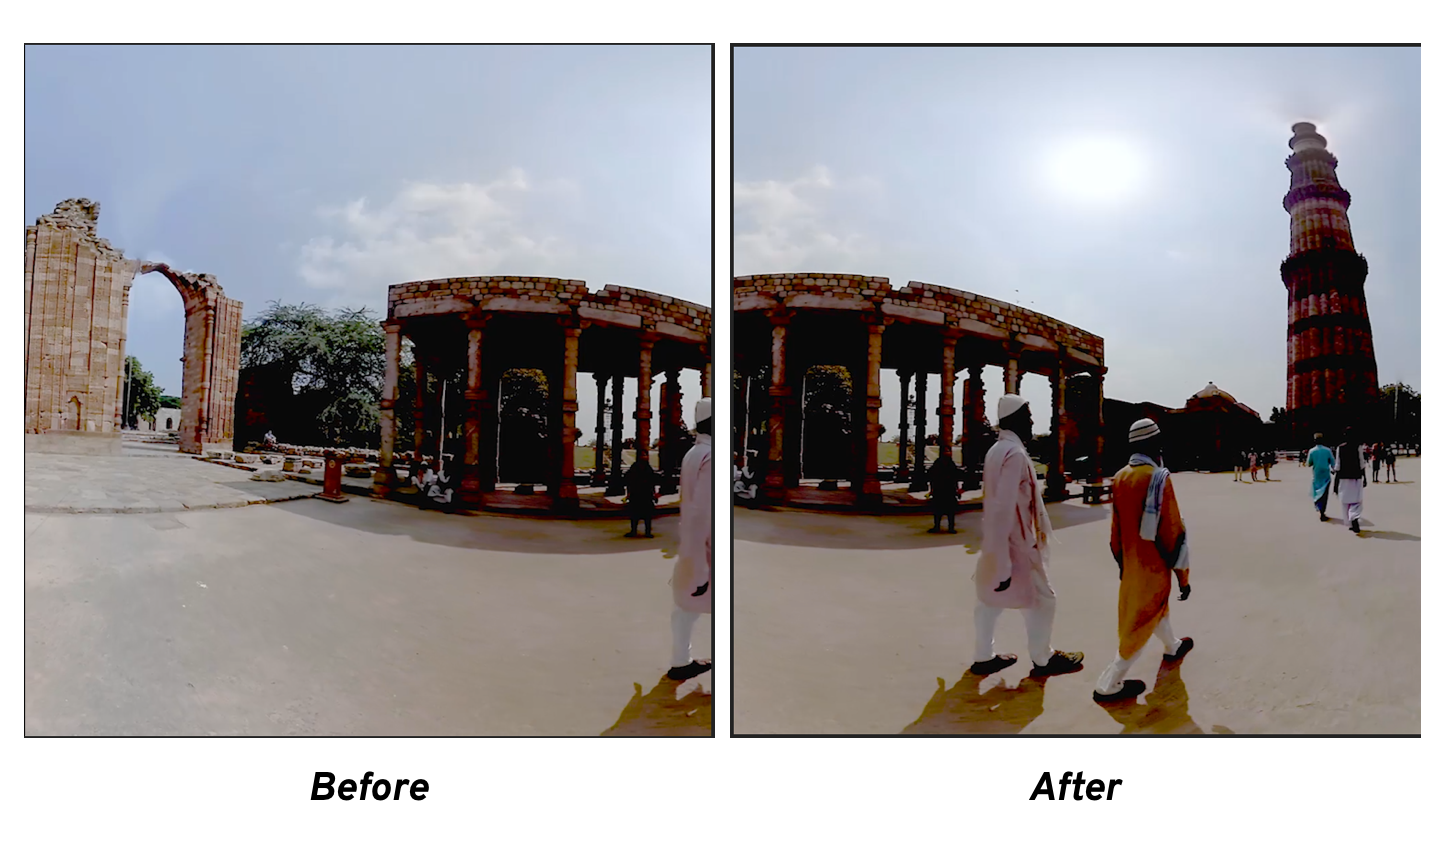
Fix the warping
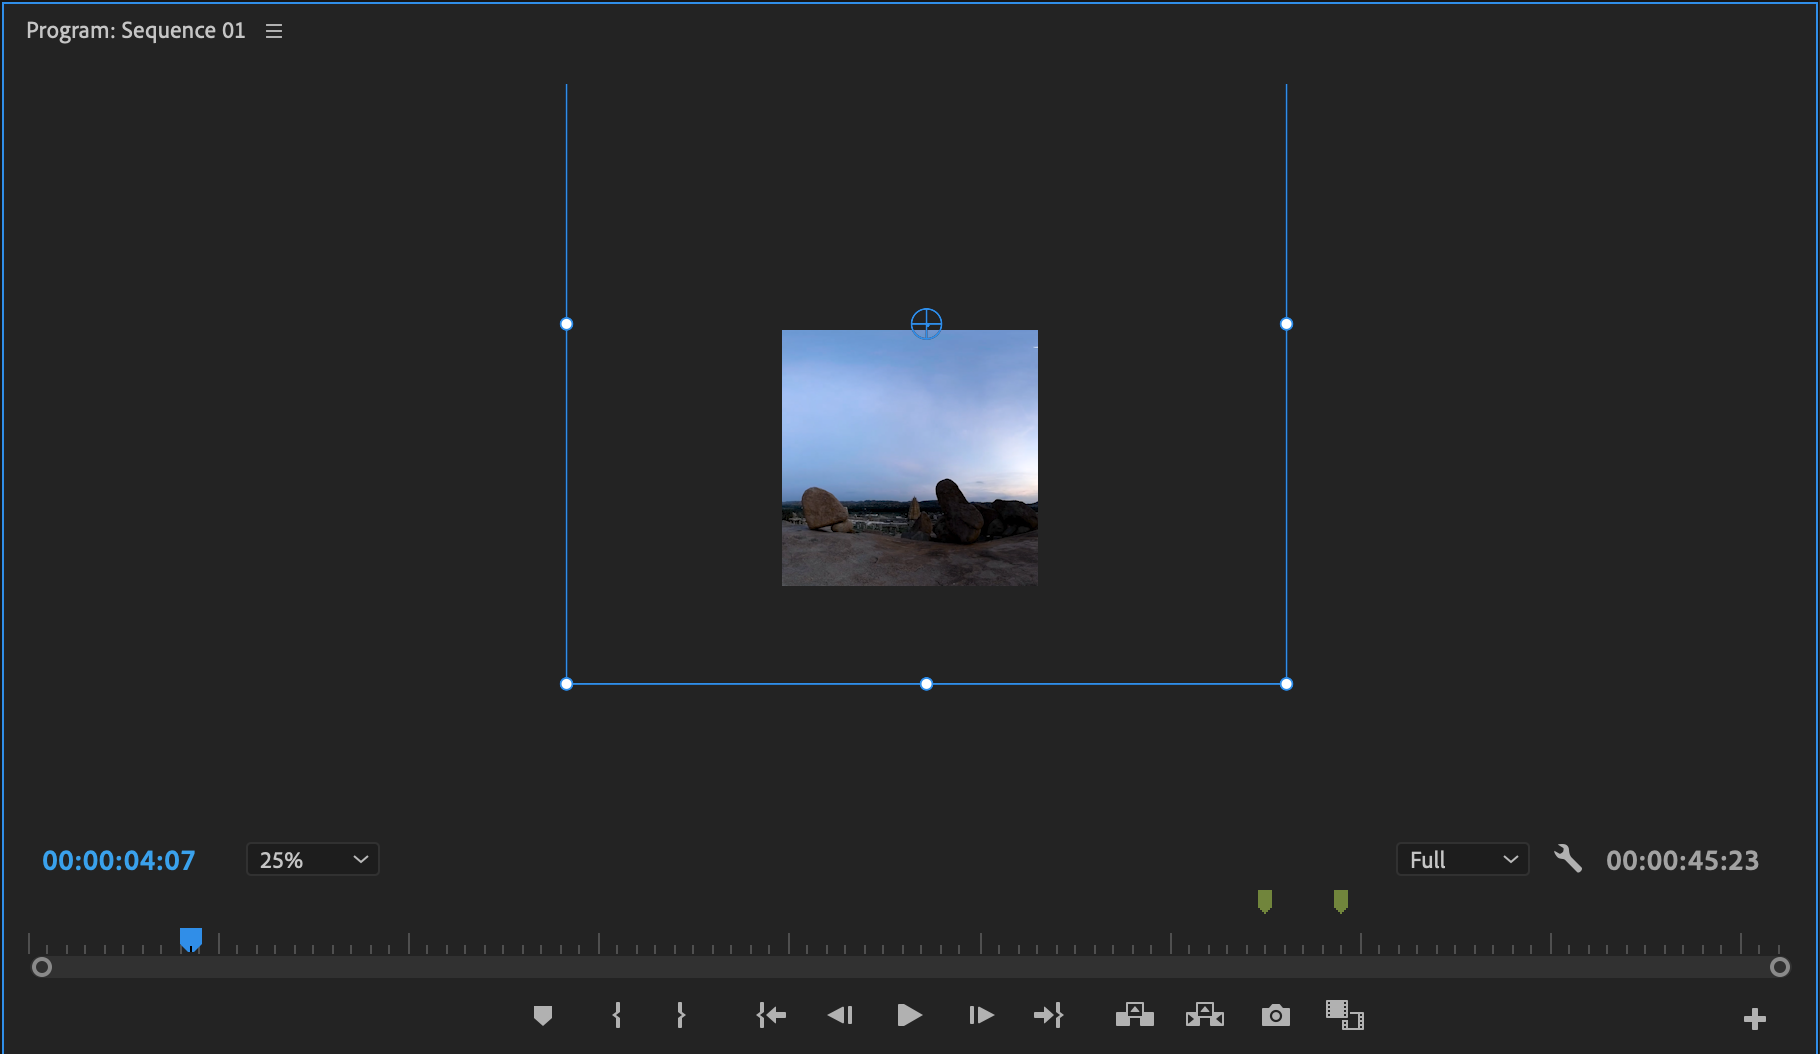
Next, take the imported 360 video (step 1) and drag this into the project sequence. Depending on how large the file is (often 360 videos are shot at large dimensions), resize this to fit the frame.
It’s important that the video does not look ‘warped’. If you were to match the size of the video with the 1024 x 1024 frame, your video would appear to look distorted and warped, since it has not been processed. To resolve this issue, make the video file around 150%-250% larger than the 1024 x 1024 frame. This should make it look more natural and less warped.
Direct the viewer using spotlights
Your video can only be a maximum of 60 seconds, in fact, just to be safe, stick to a strict 59.99 seconds as social media scheduling platforms like Hootsuite and Buffer don’t like when a video is precisely 60.0 seconds.
Cut your favourite segments of the video which best tell the narrative of the video. The aim of this is to tease the user into viewing the full 360 video on a 360 native platform like Facebook or YouTube.
Now you have a few clips cut, find view within the 360-degree landscape that is most captivating or essential to tell the narrative, and just like Facebook’s spotlight feature (which directs the viewer to a certain part of the video) drag the clips to your desired view.
Alternately, you can use keyframes to move the frame to pan from left-to-right or right-to-left, giving the effect of a 360-video which is moving for the user. This is particularly effective when tracking an object.
Export the video
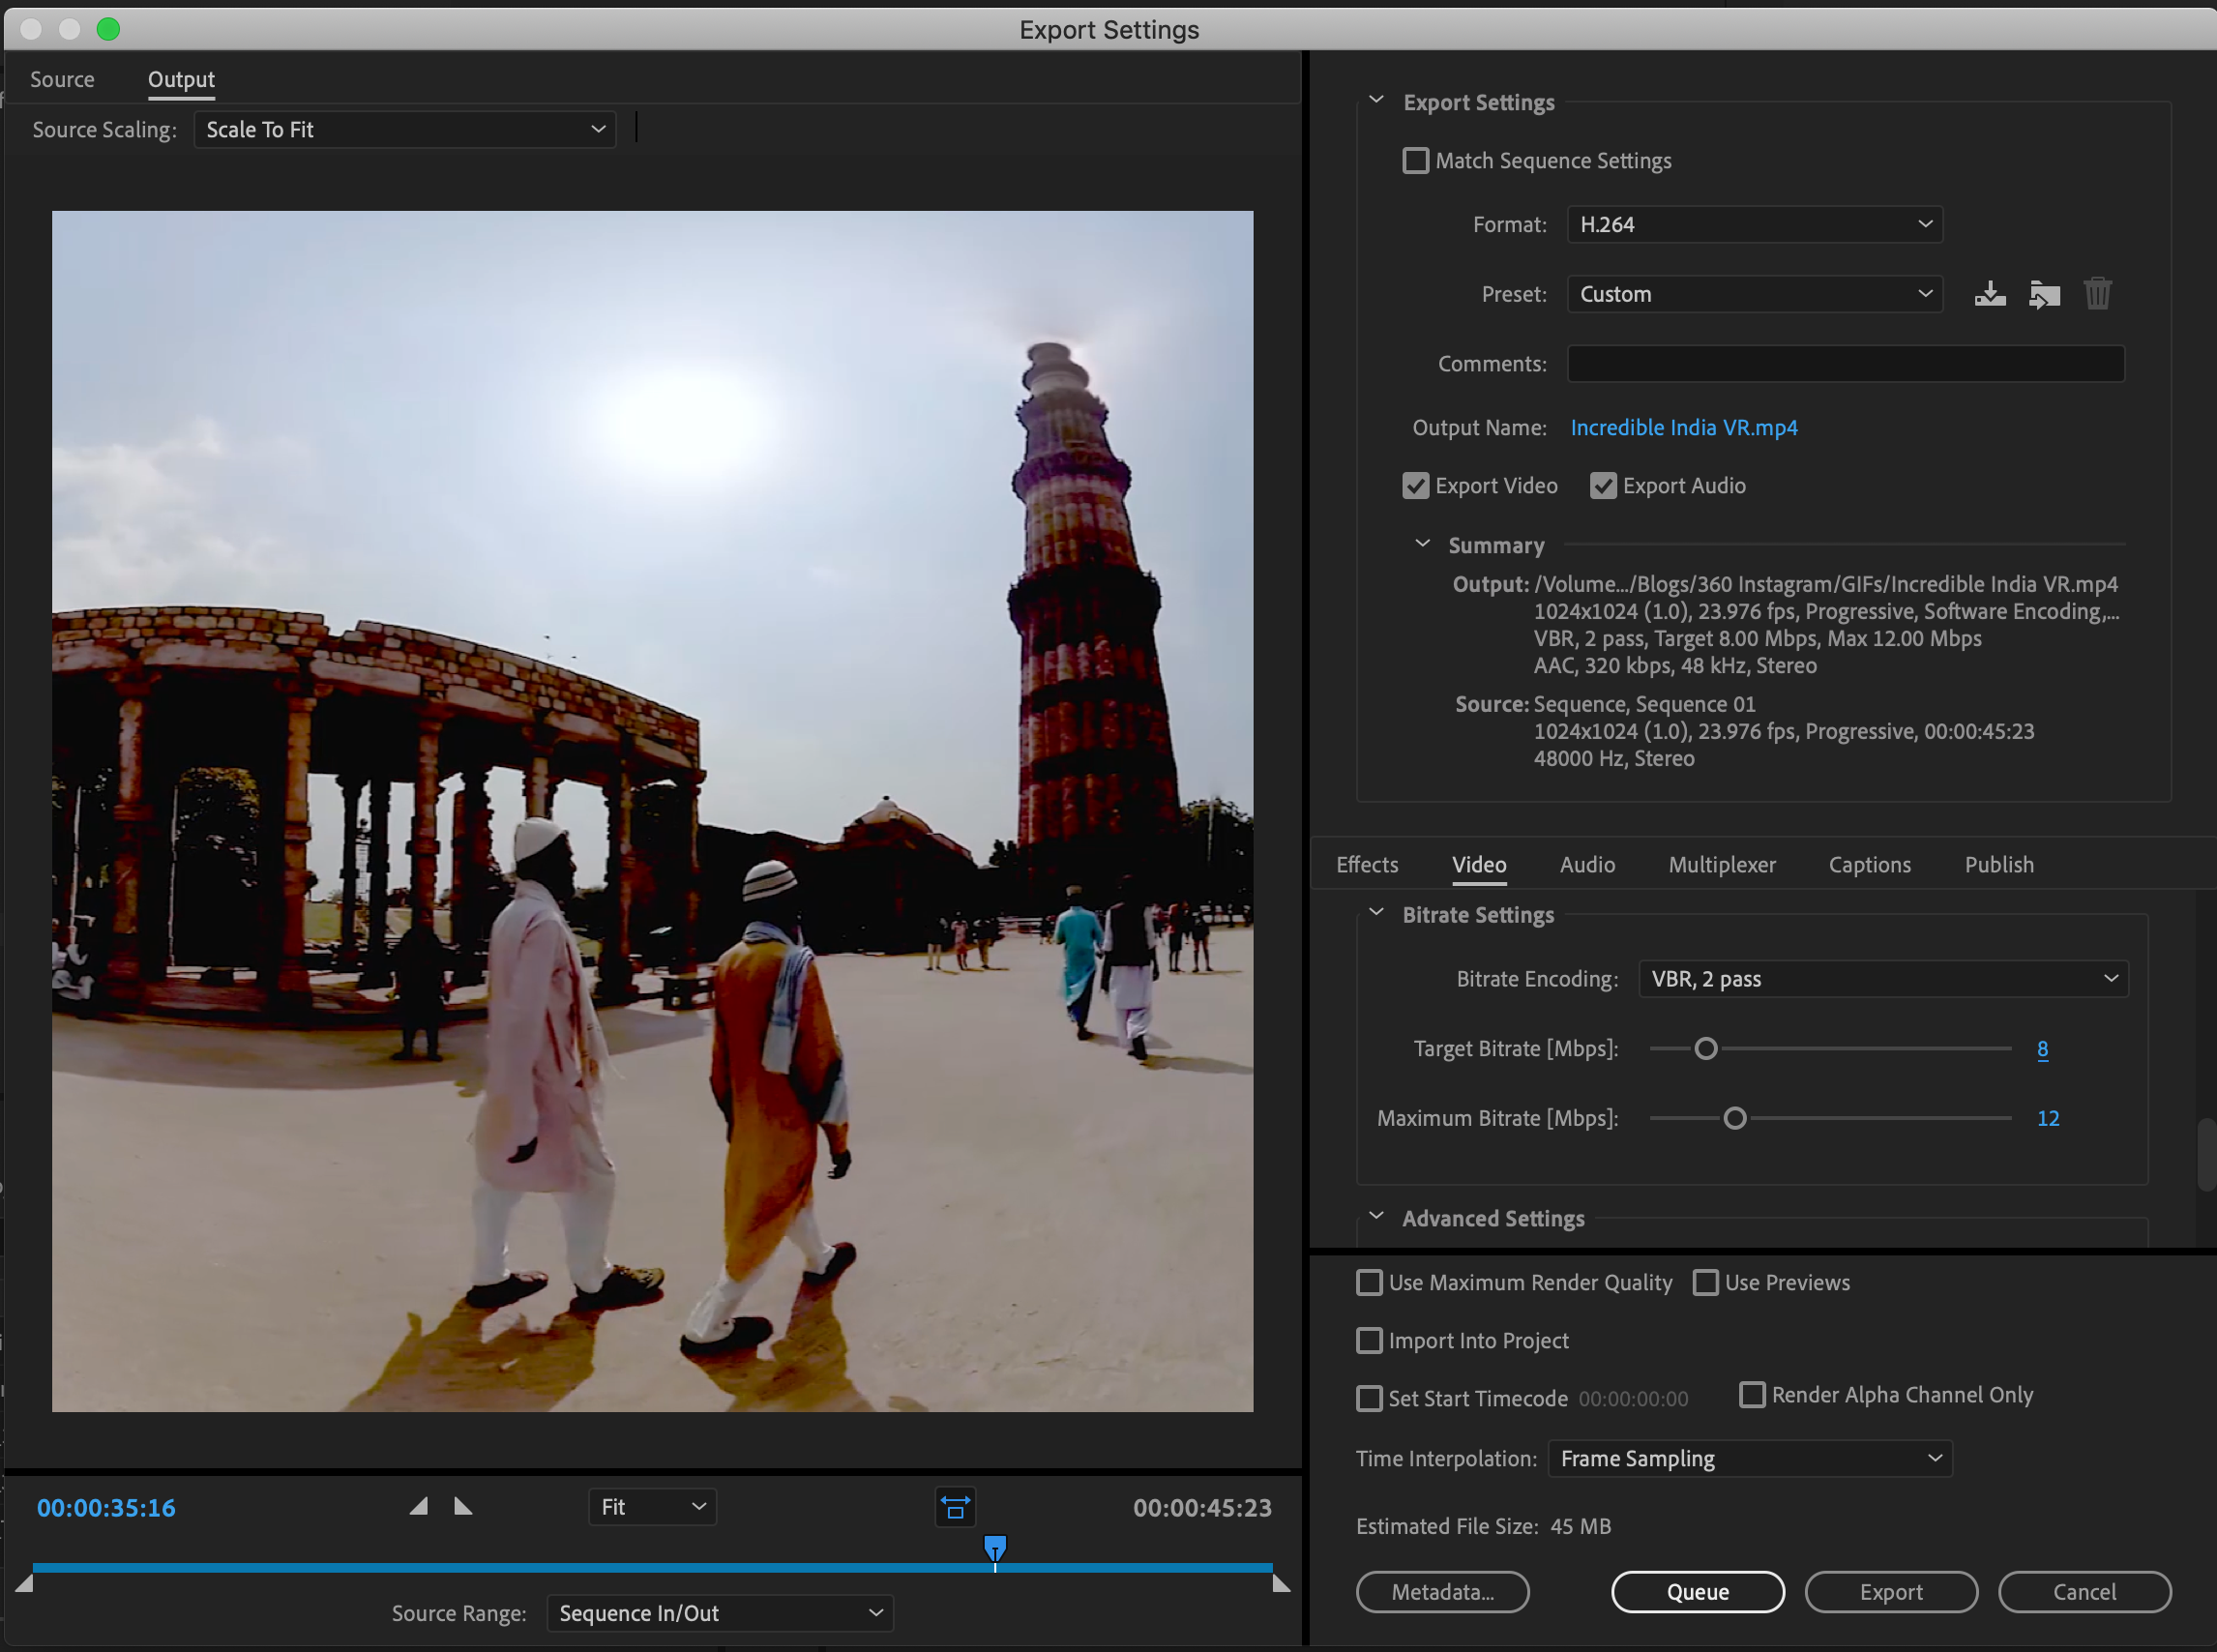
To export in Adobe Premiere Pro, go to: File > Export > Media.
In your export settings, select both video and audio, with a bitrate of between 6-8 frames. This will ensure the video is ‘social friendly’ (aka a smaller file) and will reduce the amount of compression Instagram does to your video.
You can export in either 1080p or 720p, but if you wish to also share to Twitter, make sure you export in 720p.
Remember: Instagram’s maximum video length is 60.0 seconds. Although most social scheduling platforms such as Hootsuite or Buffer cap this at 59.99 seconds.
For examples of 360 video being used on Instagram, including the video used throughout this tutorial, check out Surround Vision’s Instagram page.
If you enjoy this type of content let us know and we will make sure that we share more blogs like this.